Because let’s be honest – we all want that trendy Canva sticker aesthetic without the designer price tag
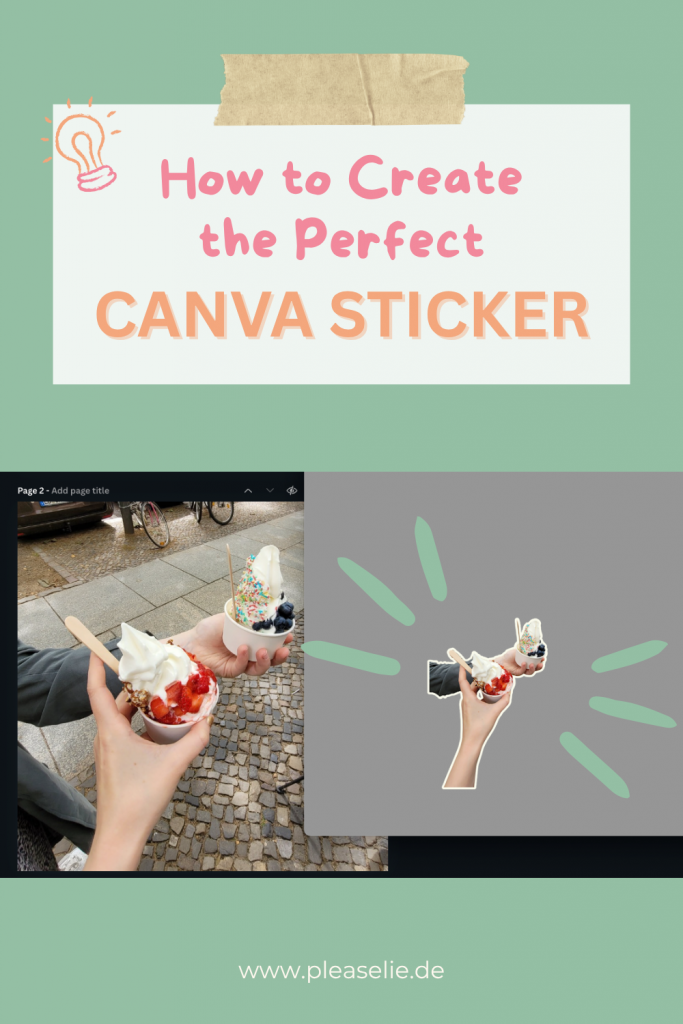
Want to know the secret to making your content instantly more engaging? It’s mastering the art of the Canva sticker! Remember when stickers were just those random things you collected as a kid? Well, plot twist: they’re now the hottest design trend taking over social media, and creating a professional Canva sticker is easier than you think.
Today I’m showing you exactly how to create the perfect Canva sticker that’ll make your content pop like bubble wrap (but in a good way). Whether you’re jazzing up your Instagram stories, adding some personality to your website, or just want to make your presentations less… well, boring – I’ve got you covered.
Why Every Content Creator Needs to Master the Canva Sticker
Before we dive into the how-to, let’s talk about why the Canva sticker is having its main character moment:
- They’re attention magnets – Seriously, try scrolling past a good sticker without stopping. I’ll wait.
- Versatility is their middle name – Use them on social media, websites, presentations, or even print materials
- They add personality – Nothing says “I’m not a corporate robot” like a well-placed sticker graphic
- They’re budget-friendly – No need to hire a designer when you can DIY like a boss
What You’ll Need to Get Started
Good news: you probably already have everything you need!
Essential tools:
- Canva account (free works, but you’ll need Pro for automatic background removal)
- A photo you want to turn into a sticker
- About 15 minutes of your time
- A willingness to experiment (and maybe mess up a little – it’s part of the fun!)
Important note: Canva’s automatic Background Remover is a Pro feature. But don’t worry – I’ll show you workarounds for free users, plus alternative methods that work just as well!
Quick Reality Check: Free vs Pro Features
Let’s be real for a hot second: Canva has moved some key sticker-making features to Pro recently. Here’s the honest breakdown:
Canva Pro (€11.99/month):
✅ Automatic background removal
✅ Transparent PNG downloads
✅ Advanced editing tools
✅ Premium stock photos
Canva Free:
✅ Basic design tools and effects (including the crucial glow effect!)
✅ Tons of free stock photos
❌ Auto background removal (but I’ve got workarounds!)
❌ Transparent downloads (creative solutions ahead!)
The good news? You can absolutely still create gorgeous Canva stickers with the free version – you’ll just need to be a bit more creative about it. And honestly? Some constraints lead to the most innovative designs!
Step-by-Step: Creating Your First Canva Sticker
Step 1: Choose Your Photo Wisely
Not all photos work well for a Canva sticker. Here’s what creates the best results:
Good sticker candidates:
- Clear subject with defined edges
- Minimal, clean background
- Good contrast between subject and background
- Not too many tiny details (they get lost in the sticker effect)
Where to find photos:
- Your own photo library (obviously)
- Canva’s stock photos (tons of free options)
- Unsplash, Pexels, or other free stock sites
- That random photo you took of your coffee this morning (yes, it could work!)

Step 2: Set Up Your Canva Workspace
- Open Canva and click “Create a design”
- Choose your dimensions – I usually go with:
- Instagram Post (1080 x 1080px) for social media stickers
- Custom size for specific needs (like 800 x 600px for web graphics)
- Upload your photo by clicking “Uploads” in the left sidebar

Step 3: Remove the Background (Pro vs Free Methods)
This is where the sticker transformation begins, and I’ve got options for both Pro and Free users:
For Canva Pro Users:
- Select your photo and click “Edit image”
- Click “BG Remover” – Canva will automatically remove the background
- Wait for the magic to happen
For Canva Free Users – Don’t worry, you’ve got options!
Method 1: Pre-edit your photo
- Use a free background remover like Remove.bg or Background Eraser apps
- Upload the already-edited photo to Canva
Method 2: Choose photos with simple backgrounds
- Pick photos with solid, contrasting backgrounds
- Use Canva’s basic editing tools to crop tightly around your subject
Method 3: Create the sticker effect without removing the background
- Keep the background but make it part of the design
- Use geometric shapes or frames to create a sticker-like border

Step 4: Fine-Tune Your Cutout (Pro Users Only)
Pro users: If you’re using Canva Pro and the automatic background removal, here’s how to perfect it:
- Use the “Restore” brush to add back parts that got accidentally removed
- Use the “Erase” brush to remove stubborn background bits
- Adjust brush size for precision work
- Toggle “Show original” to see what you’re working with
Free Users: Your pre-edited photo or creative background approach is now ready! Double-check that all edges look clean and the subject is clearly recognizable.kip to Step 5 – your pre-edited photo or creative background approach is ready to go!

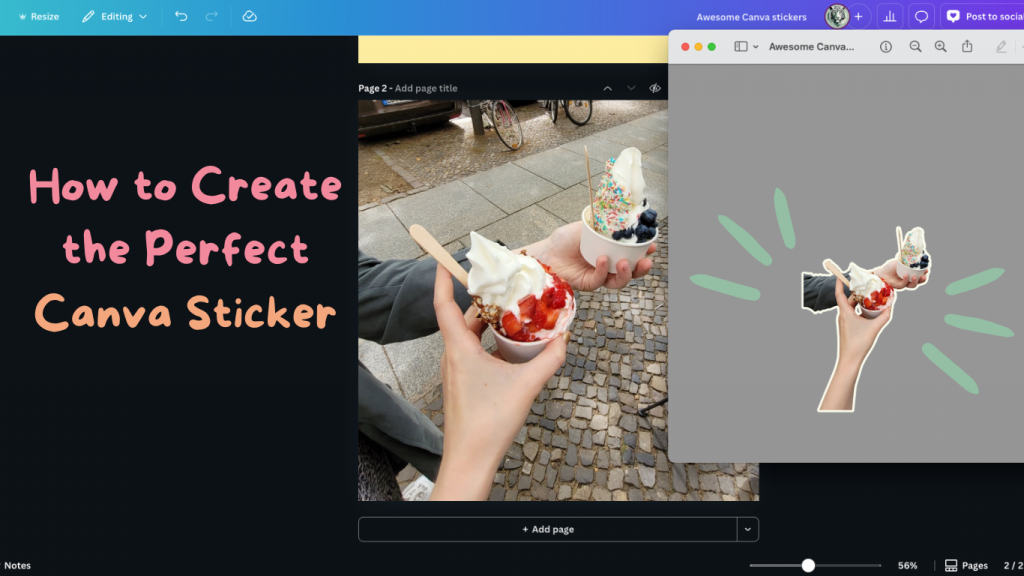
Step 5: Perfect Your Canva Sticker Effect
Now for the fun part – creating that signature Canva sticker look:
- With your photo selected, click “Effects”
- Navigate to “Shadow” effects
- Choose “Glow” (this creates that classic sticker outline)
- Adjust the settings:
- Size: 8-20 (start with 12 and adjust to taste)
- Blur: 0 (we want crisp edges)
- Color: White or a color that contrasts with your image
- Intensity: 80-100%
Step 6: Add Some Personality (Optional but Recommended)
Want to take your sticker to the next level? Try these add-ons:
- Text elements – Add a fun caption or label
- Shape overlays – Geometric shapes can add visual interest
- Color adjustments – Make your image pop with brightness/contrast tweaks
- Multiple copies – Create a sticker sheet with variations
Pro Tips That’ll Make You Look Like a Design Genius
Color Coordination is Key
Match your sticker’s glow color to your brand colors or the overall aesthetic of where you’ll use it. Consistency = professional vibes.
Size Matters
Create your stickers at a high resolution so they look crisp whether you’re using them tiny on social media or large on your website.
Batch Processing is Your Friend
Got multiple photos? Set up an assembly line approach – upload all your photos, then go through each step for all of them at once.
Save Those Templates
Create a template with your preferred sticker settings so you can quickly apply the same style to new photos.

Creative Ways to Use Your Canva Sticker Designs
Now that you’re a Canva sticker pro, here are some fun ways to use them:
For Social Media:
- Instagram story highlights
- Facebook post graphics
- Twitter header images
- TikTok video overlays
For Your Website:
- About page personality boosters
- Product showcase graphics
- Blog post featured images
- Newsletter graphics
For Presentations:
- Slide decorations
- Section dividers
- Fun bullet points
- Team member photos

Common Mistakes (So You Don’t Have To Make Them)
The “Over-Glow” Trap: More isn’t always better with Canva sticker effects. If your sticker looks like it’s radioactive, dial back the glow intensity.
Ignoring the Original: Always check how your Canva sticker looks against different backgrounds. What looks good on white might disappear on light colors.
Forgetting About File Formats: Save as PNG with transparent background for maximum versatility.
Perfectionism Paralysis: Your first Canva sticker doesn’t need to be museum-worthy. Just start creating!
Wrapping Up (Because We All Have Things to Do)
Creating a professional Canva sticker is honestly one of those skills that seems way more complicated than it actually is. Once you get the hang of making your first Canva sticker, you’ll be turning everything into stickers – your morning coffee, your cat, that random plant in your office.
The key to mastering the Canva sticker is to start simple, experiment with the settings, and don’t be afraid to make mistakes. Some of my favorite Canva sticker designs came from happy accidents when I was just messing around with the glow settings.
So go forth and create amazing Canva stickers! Your content (and your audience) will thank you for it.
Frequently Asked Questions About Canva Stickers
Q: Can I create a Canva sticker for free? A: Yes, but with some limitations! Canva’s automatic Background Remover requires Pro, but you can create stickers using free background removal tools like Remove.bg, or by choosing photos with simple backgrounds and using creative design techniques.
Q: What’s the best size for a Canva sticker? A: For social media, 1080x1080px works great. For website graphics, try 800x600px. Always create larger than you need – you can always resize down!
Q: How do I make my Canva sticker transparent? A: Unfortunately, downloading with transparent backgrounds is now a Canva Pro feature. Free users can work around this by: 1) Using the sticker on matching background colors, 2) Creating stickers with white/solid backgrounds that work well on most surfaces, or 3) Using free online background removers after downloading your design.
Q: Can I use Canva stickers commercially? A: Yes! Canva stickers you create are yours to use. Just make sure any photos you use are either your own or from Canva’s commercial-use library.
What’s your favorite Canva sticker design or hack? Drop a comment below and let me know – I’m always looking for new creative ideas to try!
P.S. If you create something awesome using this tutorial, I’d love to see it! Tag me on social media – nothing makes my day like seeing what you creative humans come up with.
The stickers have given you Fernweh?
Get your eSIM via Saily* to have unlimited data while on vacation and check out NordVPN* to stay protected online or watch your Netflix shows available in your home country. 😉
Interested in learning about Korean culture? Check out my blog posts about Dancheong, making your own DIY souvenirs, Korean Culture with a Twist, Lotus Lantern Festival, and Traditional Children’s Games as seen on Squid Game.
Interested in things related to life in Germany? Learn more about the Bürgeramt, Berlin on a Budget, Bottle Return System, Selling and Donating Decluttered Items, The Best Season to Visit Berlin, and How to Use a Packstation.
*Affiliate link: I get a commission if you decide to make a purchase through my links, at no cost to you. 🙂